 |
| Book Cover: The finished piece... |
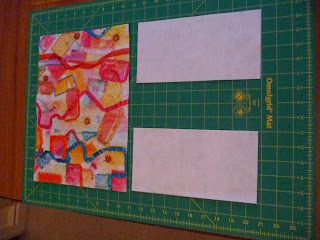
These make really handy gifts and can be reused by inserting a new book. They are relatively easy to make. You will need to spend some time creating the cover... so the fabric that you want to wrap your book in. There are several ways to make this part and its up to you to get creative and design your cover. The one I'm showing you here was created using strips of fabric attached to prefabricated felt with bondaweb, I then used a transfer printing technique to add the colours, then ribbons and hand stitching, beads and hand made discs (from tomato paste tubes) along with handmade cord to act as a fastener. The instructions below are to guide you once you have your fabric made as to how to make it into a book...
Instructions to make one:
What you'll need:
- Book
- Decorated piece to make the outer cover instructions not included below)
- Pre-fabricated felt
- Cord / ribbon for tie and bookmark
- Cutting mat & cutter or scissors and tape measure
- Sewing machine & needles & threads
- Scissors
What to do:
My book measures 13.25 inches round by 9.5 inches long (includes seam allowance).
2) Next cut your decorated piece to the size you've measured above, as follows, you might want to run a narrow short zigzag stich on the machine round the edge of the whole piece to ensure no bits fall off and it doesn't fray!
3) Now decide how deep you want your felted inside pockets to be and cut two pieces of felt to that size, for this book mine were 9.5 inches long by 5 inches wide, so now you should have the following bits cut...
4) You will need to make some cord to act as a tie round the middle. There are several ways to do this, the one on my finished book is made from ribbons twisted together and run through the sewing machine on a narrow zig-zag several times.
Now take your cord and have a play as to how you want to attach it before you launch in with the sewing machine. Fold your cover in half and decide how long you want the cord, how many times you want it to wrap around the book or how big a bow you want on the front... attach to the middle of the back of the cover with a pin, make sure your happy with the length and positioning, then sew a short 1-2 inch length zigzag on your machine to keep the cord in place at the spine of the book, ties off and hide loose ends.
5) You can also make a book mark(if you want) in the same way as describes above for the cord or for any left over front cover bits you might have, it can be attached in the same way as the fastener cord bur from the middle of the top of the spine.
6) Now pin on the felt to the back side of the cover, at the edges so you have an uncovered strip in the middle. If you have one use a quarter inch foot on the sewing machine (or use the guides on your machine) and sew all the way round the whole outside edge of the book cover and felt. Cut off any excess felt (if sometimes moves a bit when your sewing around the edge. Tie, secure and cut off any loose ends.
7) Now put the book inside its cover, wrap the cord around and ta dah your finished cover...
Enjoy!
--
Here's some more I made earlier...


No comments:
Post a Comment